Windows 7, Msysgit
If you know how to use Git, this will be pretty basic for you. This is intended for those guys who still use GUI’s and get stuck trying to clone repos in the early morning hours.
The Scenario
It’s Sunday, 1am (seriously, it is!). By the light of the Christmas tree, you decide to apply some finishing touches to the all-important project that you never got done on Friday. You have a Mac at work (yay!) and a Windows 7 machine at home (still yay, but more from a gaming perspective!). Here’s what we do.
Git on Windows
I’m sure there are loads of options here, but for me the best Windows git tool by far is msysgit. Follow the link, download the latest stable release and install to your Windows machine, we’ll wait here.
Use the recommended settings during install and you should be fine. Launch the GUI by clicking on Start > All programs > Git > Git GUI. We are cloning a repo, so choose the “Clone Existing Repository” option.
Cloning the Repo
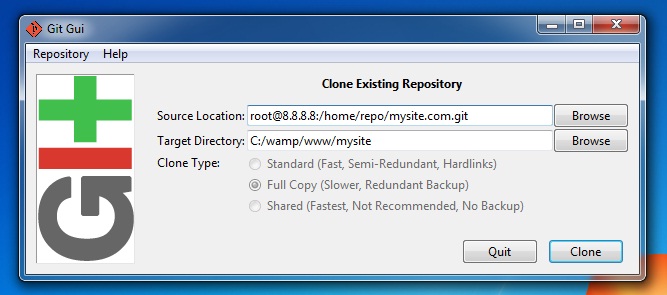
The window you get looks like the following:
As you can see, I’ve already entered the location of the remote repo. This is usually where newbies struggle, so the path structure is important to note.
Let’s break it down.
- First, I am logging into the remote server as the user “root”. Any valid user with permissions would work, like “jason” in my case.
- The address of the remote server is 8.8.8.8. Obviously this could also be a domain name, such as mysite.com or jason.github.com
- The path, starting with a colon (:), tells Git GUI where the repo lives on the server. Paths that start with a slash (/) point to the root (base) directory. Kinda like C: on your Windows machine.
- The second box points to the local directory, my Wamp folder in this case. Yes, OK… I use Wamp!
- We are cloning the full repo, so we select that option.
The Git Path
When cloning from the repo, it is enough to tell Git the folder where the repo lives. If our repo lived at /home/repos/mysite.git/.git, we could just point to the /home/repos/mysite.git directory and Git would work it out. This applies to both bare and non-bare repos.
We click “clone”.
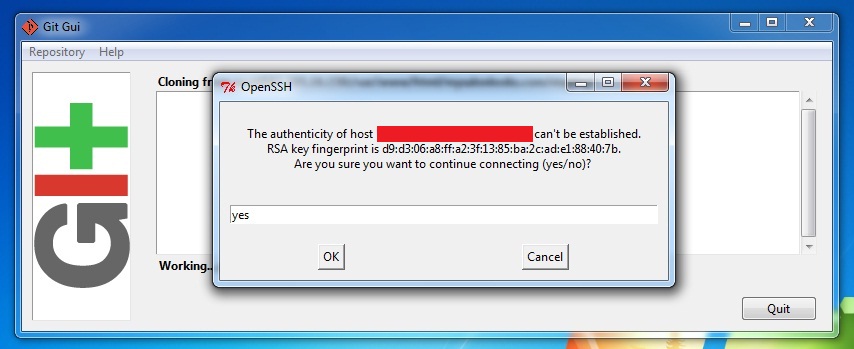
Git freaks out because it cannot authenticate the server. Just type “yes” to connect to the host (this is safe because we are requesting the address. Just make sure there are no typos).
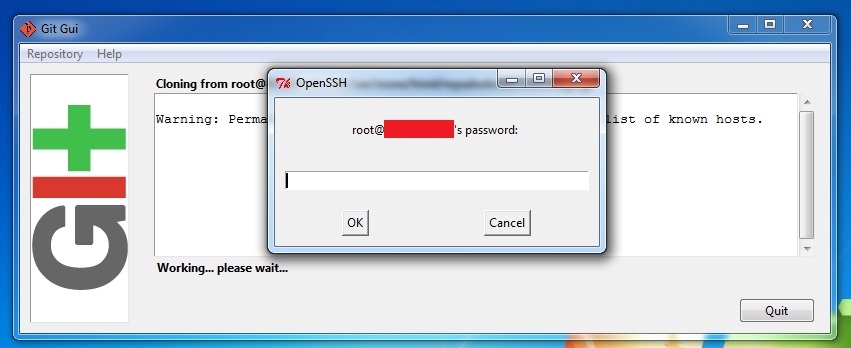
Now Git wants us to authenticate with a password. In the background, Git will log into the remote server and issue the clone command, so we need to provide our credentials, unless you have a pre-shared key. Type in the user’s password.
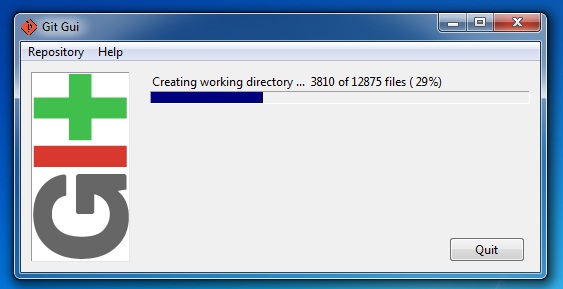
Git logs into the remote server and begins to clone the repo and we are in business!
Mac purists and even some enthusiasts will be throwing old veggies and odd bits of stationary at me right now but the fact is that some folks (even us poor developers) cannot afford to switch to Mac or/and have very good reasons for working on Window platforms.
Fortunately for us, ahem I mean, them… there are some great Windows tools to harness the power of dVCS systems like Git.
Note though, using Git on Windows is not as efficient, quick, cool or geeky as on a Mac. If you can live with that, away you go!


